Friday, November 22, 2013

Good Eats: Bell Pepper "Nachos"

My goal with this whole "eating healthy-ish" transition in the beginning was simple: make healthier choices.  I never will be a "clean eater", I have no interest in eating half an avocado for lunch, and I really like a cheeseburger every now and then.  When I decided to start eating better, I started small: one decision a day.  I started with breakfast because that's the easiest meal to change since you're home most of the time.  Healthy breakfasts turned to lunches, and now to dinners. 

What I've realized over these months of transition from little Debbie cake queen to froyo with honey is this: healthy food does NOT have to taste bad.  No rice cakes, no cardboard-tasting stuff.... and honestly, some of my all-time favorite foods taste better when they are made with healthier options.

The following recipe is a prime example of healthy changes from not-so-healthy favorites.


Bell Pepper NACHOS

Who doesn't like nachos?  They're a great combination of salty, creamy, cheesy, goodness.  But let's be honest- they're the exact opposite of good for you.  So when I came across this recipe I decided to give it a try... and you know what? I like these BETTER than my normal nachos...and I didn't miss the chips at all.


Ingredients:

1 tsp EVOO
2 cloves garlic, minced
1 c. chopped onion
1.5 c. cooked, shredded chicken (I used 2 chicken breasts)
1 tsp chili powder
1 c. salsa
salt & pepper, to taste
2 lbs mini bell peppers, cut in half lengthwise, seeds & ribs removed, and flattened as much as possible
1 c shredded mixed cheese (make sure there's Monterey jack in there!)
1/4 c. sliced black olives
2 plum tomatoes, diced
 

Preparation:

1. Preheat oven to 350 degrees.
2. Heat oil in skillet over medium. Add garlic and onions, cook 2 minutes.  Add chicken and chili powder.  Cook until chicken is warm and all is covered with the chili powder.  Remove from heat and add the salsa.  Add salt & pepper.
3. Prepare peppers: slice ends off each pepper and cut lengthwise.  Remove seeds & ribs, and make them as flat as possible.  Place on a large, ungreased baking sheet.
4. Spoon (or just use your hands---it's easier) chicken mixture onto each pepper.  Top with shredded cheese and olives,
5. Bake 10 minutes, until the cheese is melted.  Remove from oven and top with the diced tomatoes. 


I loved this recipe.  J did too.  In fact, he wanted me to go back in cook more before we were even done with the first baking sheet (hence why I upped it to 2 lbs mini bell peppers as opposed to 1). 
 
I will definitely be making this again! To keep the timing less, it would be far easier to cook the chicken mixture the night before, and then just prep and bake when you get home after work!!!
 
The combination of the sweet mini peppers and baking them so they still have enough crunch to hold all the toppings is glorious.


Happy eating,
 

Virginia

Good Eats: Chicken Stew with Butternut Squash & Quinoa

I love hearty stews during the fall.  There is something about all the flavors coming together in a nice, warm bowl that makes my heart happy.  When I saw this recipe I decided I needed to give it a try... and it was delicious! 

The combination of hearty chicken, the slightly sweet taste of the butternut squash, and the saltiness of the kalamata olives blended perfectly to create a taste-bud roller coaster.  I definitely will be making this again.


Ingredients:

2 lb butternut squash, peeled and seeded. Chopped into 1/2 inch pieces
3.5 cubs low sodium fat-free chicken broth
1.5 lbs chicken breasts (or thighs)
1 Tbsp EVOO
1 medium onion, chopped
1/2 tsp salt
4 cloves garlic, minced
1.5 tsp oregano
14 oz petite diced tomatoes, undrained
2/3 c uncooked quinoa
3/4 cup pitted, sliced kalamata olives
1/4 c. minced fresh flat-leaf parsley
cornstarch, to desired-thickness is reached.


Preparation:

1. Steam squash until barely tender (I did this in the microwave by putting 1/4 cup water in the bottom of a microwave-safe dish).  Remove 1/2 of the pieces and set aside.  Continue steaming the remaining 1/2 of the pieces for an additional 5-6 minutes, until mashable.  Mash the second set of squash (I used an immersion blender attachment).  Keep the original set of pieces solid.
 
2. Bring broth to a simmer over medium-high heat.  Add chicken and cook 15 minutes.
 
3.  Remove chicken to plate and allow to cool.  Pour broth into bowl.
 
4. Add EVOO into the saucepan on medium.  Add onion and cook 10-minutes until the onions begin to brown slightly.
 
5.  Add salt, garlic, and oregano.  Stir and cook 2-3 minutes.  Add tomatoes, squash pieces, and mashed squash.  Stir to combine. Stir in the reserved broth and quinoa.  Bring to a simmer, cover, and cook until the quinoa is done, for 15 minutes.  (At this point, you can add cornstarch by the tablespoon-ful until the desired thickness is reached.  I used around 2.5 tablespoons).
 
6. Shred chicken and add to the stew with olives and the cracked pepper.  Simmer uncovered for 5-10 minutes.
 
7.  Add parsley right before serving.  


Happy fall, y'all,
 
xoxo

Virginia


Friday, November 8, 2013

DIY: Invitations

three posts in one day...that's a lot of updates :) But, even though I put my computer away an hour ago, I'm too excited to share some of my latest creations.  :) AND as soon as I find the camera cord so I can upload pictures of one of these parties, I'll definitely be doing a post on that as well!!!

As I mentioned previously.... I LOVE PAPER PRODUCTS.  Especially invitations.  I enjoy making them, more than I could ever put into words.  Right now, it is merely a hobby for me, but recently I've been having more friends ask me to create things for them and I'm starting to realize that I enjoy this form of crafting (and craft therapy) more than I should.  There is just something about listening to someone explain what type of "look" they are going for and tweaking the document until it is exactly what they had envisioned.  Sometimes...it's hard to get into their heads and understand what they are looking for.  This is why pinterest has been a life-saver.  It is so easy to look at other invitations or items and say "I like this  about invitation A, but I prefer _____ from invitation B".  Then, you spend a day mixing the two together and you have a pdf of a combination of both.


NOTE: All of my invitations are hand-crafted by myself, so while I try my hardest to make them as identical as possible, there will be minor variations in each one.  While I find this quality endearing, which is why I wanted to make my own wedding invitations, if you are a "I want them to be EXACTLY the same" kind of person...you can stop reading this post now.

"I Do" BBQ & Wedding Shower

A southern-style BBQ, "falling in love" theme for a couples shower hosted in the fall months.


My husband, mother, and I recently hosted a wedding shower for my oldest friend, Brooke, and her hubby to be, Chadwick.  They are getting married next April and since her bridal shower was going to be mostly family, I decided to throw her a couples wedding shower.  The theme was "Falling in Love" and titled an "I Do" BBQ.  Fall color palate of oranges, burlap, and chocolate brown.  Sunflowers, berries, and other fall foliage.  A dessert bar with a lot of "acorn" inspired treats which were super fun to make :).  It was a lovely time...but my most favorite thing out of everything made for the day was probably the invitations.


I created this PDF one afternoon and thought it was missing something but at the time couldn't figure out what it was.  Then I decided to add the tag to the jar with bakers twine with their registry information on it and the subtitle of "Fall in Love".

 
I loved being able to be playful with fall colors and fun fonts for this since it was an informal affair.
 
For the envelopes, I wanted to use kraft brown envelopes but I felt they were too plain.  I added a mason jar stamp and then a heart stamp, and then (not pictured here) hand-wrote the wedding date inside each jar.
 
The party itself matched the invitations-colors, textures, and all.  Oh yes, and of course mason jars were the centerpieces and drinking glasses :)


Wedding Invitations

From our Lowcountry wedding- soft shades of peaches and pinks coupled with the natural textiles of burlap and twine made up the feel for our wedding.

 
As I posted previously here about our wedding details, I first realized I enjoyed making invitations when we were preparing for our pending nuptials.  In case you didn't catch the post, here is a picture of our wedding invitations I came up with.
 

kraft brown pocketfolds, shimmer pink backing and shimmery ivory cardstock for the invitation and card sets.


I also decided to continue on the theme and make wedding programs as well, but wanted each to be bright and cheerful and unique so I created and assembled these:


I loved the different papers, ribbons, and backings.  I thought this was my way of getting lots of color into the wedding without it taking away from the otherwise peach/tan/brown color scheme!


Glitter Bachelorette Party Invitations

Where girly-girl lovebird meets sass-a-frass.  The combination of subtlety and flowing lettering with intense sparkle gives these invitations the feel I am going for.

 
Since my best friend is getting married next Spring, I took the opportunity to go ahead and create some invitations for her bachelorette weekend.  I got the design inspiration from a collective force of pinterest samples.  The theme.... glitter ... but I wanted it to be sweet/sappy as well... so here goes nothing :


textured glitter backing, shimmery white cardstock for invitation, and glitter cardstock hearts strung together on a strip of hemp.  I can't WAIT for this party.


I think invitations, especially weddings and showers, should be unique.  I think they are a perfect opportunity to showcase what your event will be about, while simultaneously showing your personality.  This is why I love creating them: it gives me the opportunity to set the stage for an upcoming event. 
 

Currently, I'm in the process of creating an invitation set with pocketfolds for my friend, Brooke's, wedding.  I can't wait to assemble a sample together and show you guys!!!
 
 
xoxo,
 

Virginia


Our Wedding

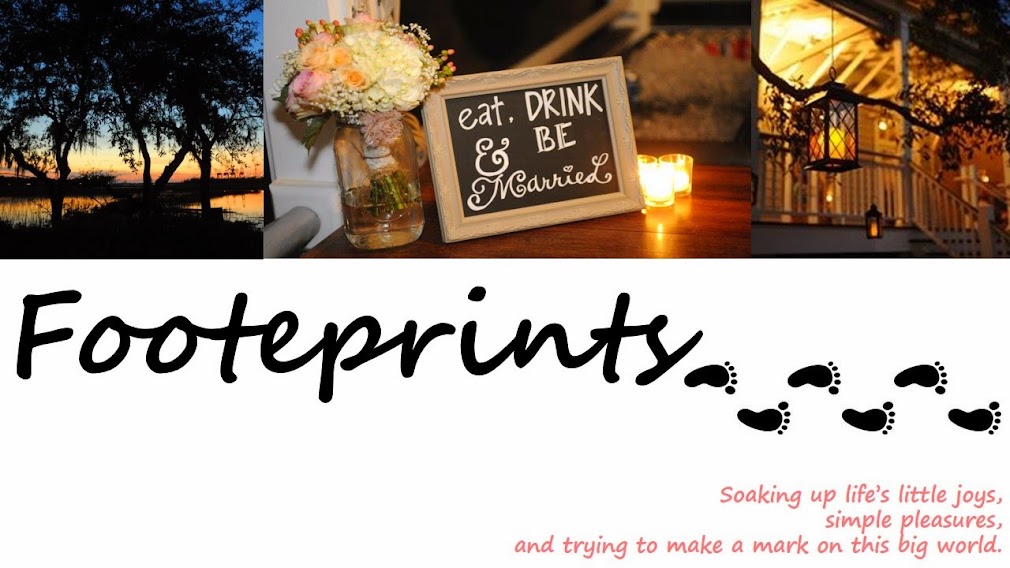
March 9, 2013- wedding details

 
I love weddings.  I can honestly say that I loved every minute of planning our wedding except for the last month when I had to hand over the reins to other people and just "trust" that things would come together.  I'm not very good with that, especially after 15 months of intricately planning every last detail.
 
 
This post will be long, I apologize in advance.
 
One of the first things I did for our wedding was come up with the theme.  We wanted a "Charleston" wedding.  I wanted the lowcountry tide and marsh in the photos, I dreamt of wrap-around porches, sweet tea in mason jars, southern food, twine.... cowboy boots.  This part was easy... it was all the things that J and I loved all combined into one.
 
 
The problem was that the wedding was actually planned around one single thing: a tie.  J happened to find "the perfect" plaid tie on a whim 1 week after we were engaged....he said he wanted to wear it to the wedding.  So I said, sure, I'll plan the wedding around the tie.
 

Floral Arrangements

Now, I'm very much a DIY-er.  I genuinely enjoy crafting, I love making things, and I love the one-of-a-kind vibe you get from carefully planned and created décor.  So I bought a lot of mason jars, too many rolls of twine, lots of hot glue sticks, and got to work. 
 
I knew I wanted spring flowers- but not perfectly crafted bouquets.  I wanted it to look more like someone swept a bunch of similar colored flowers up and placed them in jars.  And I wanted the simplicity of baby's breath.
 
My precious father-in-law was sweet enough to surprise me and cut down a tree into wood slices (literally) when I saw a picture of jars on wood slabs and said "I would love that for the wedding".  I got a text two days later as a picture message of wood in the back of a truck....my heart melted.
 
ivory linens. chiavari chairs, mason jars

lace...twins..different jars.. you get the vibe
 
my bouquet... which has two brooches on it. One belonging to each of my grandmothers who were unable to be with us that day since Heaven is awfully far away...but I wanted them to walk with me down the aisle.

FYI: quilted mason jars make EXCELLENT candle holders with the way light reflects through the glass.

more centerpieces

The groomsmen and groom had palmetto rose boutonnieres...just to be true to Charleston :)  I also love that since they are made from palmetto leaves, I get to keep J's forever :) 

baby's breath in the sunlight

cocktail table.  This is where I let myself use colored linens.


Bridesmaids Dresses

 
I knew I wanted mis-matched dresses from the very beginning.  Not because this was a "trend", but more because I genuinely like the look. I also wanted a variety of textures and fabrics and colors, as well as prints.  Sounds like a big mess, right?  J thought so...so did everyone else when I told them I did not want traditional bridesmaids dresses.  They cringed when I said "prints" and when I responded to the "well they'll all be the same fabric, right" with a firm "definitely not" I think some of them had an aneurysm.  But it was what I wanted, and I was determined to make it work!
 
I wanted shades of peaches and pinks.  Soft colors, delicate details, and a variety of styles.  I wanted each girl to find something they loved and could wear again (you've heard that before, right?).  I also wanted to have jewelry made custom for each girl that was different, yet cohesive.  And when I stumbled across a store on Etsy that provided just that, I thought my heart would flutter right out of my chest in joy!
 
 
Brooke, my MOH

All the dresses (minus brooke's).  Chiffon peach with rhinestone detailing, three-quarter length sleeved lace dresses with scalloped hemlines, and a darling vintage print dress completed the look.
 

Ready for this? I found them at Dillards.  Not joking.  Totally serious.  WHICH WAS GREAT because they could go to their local dillards and buy them/try them on... oh yeah, my girls spanned 4 different states, 7 different cities.


Paper products and Chalkboards

 
I love paper.  I love invitations--they're the first thing your guests see when they get invited to your wedding.  It's your time to set the stage for the upcoming event.  Unfortunately, invitations get expensive , and also it's really difficult to find one that is "just right."  SO.... I made ours.
 
I had a vision in mind-- I wanted kraft brown folds, and shimmery ivory papers, and more mason jars, and pinks/peaches (just like the bridal party dresses)...here is what I came up with and created.
 
Each tie was a bit different, with our monogram of "F" on there.
 
all tied up!

pocketfolds = my favorite.  Everything gets so organized and stays that way through mailing!

 
The whole set together! 
 
 
As for the chalkboards- I lucked out and got a lot of cute frames at Homegoods and then a GIANT frame at a yard sale.. then I taped and used chalkboard paint to create them and chalk pens.  I love chalkboards.


Programs- when I created these- I wanted splashes of color...I also wanted 150 different programs. So no two programs are exactly identical :)

 
Stole this from pinterest... not ashamed

with our guestbook

Our guestbook alternative: the thumbprint tree.  Which was extra special because one of my best friends painted it for me!


I had this created from a fabulous etsy shop of us and our furchildren :)


We went with cupcakes-- minis, regular, and jumbo.... we had all intentions of cutting into the giant one...but we ended up cutting into a mini for the cake cutting :)


The Venue

This was the first thing we decided on.  We got married at Creek club at I'On and I wouldn't change that at all.  It had a large porch with extra seating, and a gorgeous wood-paneled interior with exposed beams, and views of the marsh that were out of this world.  We got married outside under a beautiful oak tree.  When people ask me "what was it about this venue that made you choose it?" I can't really explain it without sharing some of our favorite pictures.
 
entire bridal party

sunset over the marsh

giant tree


dances on the dock at sunset

all smiles :)

views of the Charleston marsh
dad's tie: Etsy :)

Creek club at I'On

hanging lanterns


There are so many details that go into a wedding that I couldn't possibly share them all, but these are definitely some of my favorite from ours. 
If you are looking to get married in the Charleston area and would like more information on any of the vendors that we used, please feel free to contact me! I wouldn't have changed a thing!
 
So there you have it.  My Charleston-inspired DIY wedding.  Lots of long nights with my hot glue gun and paper products went into this wedding, but I loved taking the time to make all the details!


My favorite gift:

Everyone has a favorite gift from their wedding, right?  Most people just don't say "YOUR gift was my favorite"... well, I have to brag a little on my sweet cousin, Katie here for a minute. 
She captured some of our wedding on video and put the film to the lyrics to our first dance song... and she did an absolutely phenomenal job.  this is, by far , my most favorite part of the wedding.  I didn't want a videographer at the wedding (no offense to you all who want every minute of your day captured), but having a highlight video like this I would definitely recommend people do. It's my favorite memory of the day... and I know I will cherish it forever.
Don't believe me? Watch this < 5 minute video and I promise you'll want one for yourself
 
 
Credits:
 
 
Happy wedding planning,
xoxo

Virginia


DIY: Office Makeover

Phew....

that was a long break from blogging.  Hello bloggers, I'm backkkkkk.  And this time, am going to attempt to be better at keeping y'all up to date with what all goes on.  I've been cooking up a storm recently, and have lots of delicious recipes to share!!  But first things first...remember that office makeover I mentioned months ago?  Well, here's the post on it!!

Office Makeover

I love offices.  I love tranquil offices that both are functional, yet organized and decorative.  I find myself drawn towards common themes, whether that be color palates, trends, or even textures.  I think offices should both reflect your personality, but also a set of emotions such as calmness.  When J told me that he wanted me to decorate his office at work I was ecstatic.  I love decorating! I like finding bargains on things and changing the entire feel for a room....
 
He warned me that the before was going to be hard to handle...but I said I could tackle anything.  The previous tenant in his now office was particularly attracted to bold, neon colors.  Which is awesome, but J is definitely more of a bold, classic, calm color person.
 
Now when I start a decorating project.... I like to draw everything out (neurotic...I know).  But this saves me money in the long run because I can incorporate items we already have and then have a list of exactly what we still need. Here were some of those papers getting ready
 
 
I draw things out based on overall plan as well as each individual wall.  Then make lists of : "what we have" and "what we need to get". 


The before....
 
green...and lots of it.

the chair and the furniture we would keep.  The chair here was a graduation gift from the department for J finishing his residency training!

before you get too excited about the window...that window does not go anywhere...in fact, if you open the blinds it opens into a library.... where other people are... awkward.  I decided to cover it up!


Getting Started

After many trips to Home Depot looking at swatches of colors, we finally decided on a dusty blue...not baby blue like nursery blue, but one with hints of gray undertones to make it more relaxed.  I didn't want to go with the stereotypical "beige" or "tan" office, and since the area was small, I didn't want to go with brown either.  White would be too boring too, so blue seemed a good fit!!!
 

If you haven't noticed by now, I love "rustic" themes... I love twine, and mason jars, and burlap.  I love antique pictures, glasses, baskets.  I like the homey feel it gives, and I also love that it has its own story attached to it.  Not one for history, but having a painting hanging that I found at an antique shop in Savannah and being able to say "someone else had this hanging in their house once" just gives me happy thoughts.  I wonder if they got as much joy as we now do from it.
 
 
Anyway...enough rambling.
 
After a day of painting (and multiple coats of paint) we ended up with a gorgeous blue!! We decided on shades of brown, tan, and blue with hints of burlap, twine, and of course...mason jars (duh). 
 
 
Lamps: you may recognize these from the goodwill lamps post here.  I thought they worked perfectly in J's new office!!!
 
The picture now covering the mirror was a steal at Kirklands-- $19.99!! AND IT FIT PERFECTLY. the odds of that, I recognize, are slim to none. But I definitely recommend you all check out Kirklands every once in awhile--you never know what kind of art you may find!! 
 
The burlap backed push-pin board we found at Marshalls Home Goods...another one of my all-time favorite stores.
 
The three picture frame located above the board was one from home.  I put in two black and white pictures from the wedding and then used scrapbook paper and a wooden "J" that I painted in the middle to match the pin-board.

 
Front corner.  The left painting is a sketch of the hospital where J works.
Pillow- Potterybarn (my weakness)
Lantern- from our wedding
Blue candlestick- Homegoods
Painting on right wall: antique daschund painting we found on our savannah getaway weekend.

chalk board office supply holders- Homegoods
Chickenwire basket- Homegoods

 
Close-up of the pinboard and frame.

 
Clock- Kirklands: $19.99
Twine "F": DIY: wooden letter from Michaels wrapped with twine
baskets- Homegoods
Mason jar with wooden accent balls- Homegoods + jar from wedding
Antique doctor's bag: gifted


All in all, I love the change and I think we found some good bargains that we will use in future decorating adventures as well!  He's happy too, with his peaceful, organized, relaxed office!!!
 
 
Happy decorating, y'all
 

Virginia


Sunday, September 15, 2013

Good Eats: Chicken Pot Pie


I love chicken-pot pie.  I don't like all the condensed soups that create the filling, though.  I also am not a big fan of making my own crust from scratch, so I prefer the "semi-homemade" chicken pot pie...this way I can get all the flavors, none of the condensed soups, and still can cheat and use refrigerated pie crusts :) .

This recipe has become a staple for us...it is one of the only recipes that J remembers to ask "can we have that pot pie again next week"...which means I am happy to oblige.

The original recipe is located here, and her pictures do this dish far more justice than mine... I didn't seal my edges all the way so my crust is not nearly as beautiful as hers, (but it was still delicious!)

This is also one of those dishes that you can freeze in Tupperware and you can reheat it and it tastes delicious all over again.  (sigh)....I absolutely love simple recipes that are delicious and you can reheat frozen portions later...what a beautiful thing.

On to the recipe.....


Ingredients:

 1 box of pie crusts, at room temperature (I let mine sit out for 15 minutes prior to using them)
 1/3 cup unsalted butter
 1/2 cup chopped onion
 1/3 cup AP flour
 1/2 tsp salt
 1/4 tsp pepper
 1 and 3/4 cup chicken broth
 1/2 cup skim milk
 1 lb cooked, shredded chicken (I baked mine at 350 for 40 minutes and shredded it in my kitchenaid
         mixer..I also sprinkled it with Lawry's seasoned salt)
 1 small bag frozen, mixed veggies, thawed (around 2.5 cups)


Preparation:

1. Preheat oven to 425.  Spray glass pie dish with cooking spray.  Place bottom crust in greased dish. 
2. In saucepan over medium, melt butter.  Add onion and cook for 3-4 minutes, stirring often. 
3. Add sat, pepper, and flour.  Gradually add milk and broth.  Continue to cook and stir until it is bubbly (you may increase the heat to medium-high to achieve the bubbles as needed)
4. Stir in shredded chicken and thawed mixed vegetables.  Continue stirring until the sauce is thickened.  Remove from heat.
5. Pour into bottom pie crust.  Top with second crust and seal the edges.  Cut slits into top crust to permit airflow.
6. Bake 30-40 minutes (if your edges begin to brown too much, cover pie crust edges with tin foil after 15 minutes of cooking).
7. Let stand 5-10 minutes before serving.


Simple enough? I vote yes. So much so, that this is on next weeks' meal plan as well :)


Happy cooking, y'all,

Virginia